It’s just a guide, we are not pro-Tomcat or pro-Eclipse
I’m a big fan of Jetty’s clean APIs and I use it both for development and production depending on a project, but since I got tired of people complaining about Tomcat just because they haven’t used it or use it wrong, I put this guide together for developing webapps in Eclipse with Tomcat.
-Kalle Korhonen / tynamo.org
Tomcat 8 and Eclipse configuration
Here’s the toolset that you should be using: Eclipse Mars (4.5), Eclipse Tomcat Plugin from plugin marketplace (originally forked from Sysdeo’s Tomcat plugin ) and Tomcat 8.x ( + M2Eclipse 1.6.x (directly from eclipse.org depending on whether you are using Maven or not). Eclipse WTP’s generic container support used to be slow and error prone, so I don’t like using it but it’s gotten a bit better over the years. There are other Tomcat plugins for Eclipse but the Eclipse Tomcat Plugin is the most comprehensive one. Generic tools that support more than one container or technology tend to copy files around for easier deployment so avoid all of that - it slows things down and is completely unnecessary given the right set of tools.
In the following, it’s assumed you have Java, Eclipse and m2eclipse installed. Below we use one of Tynamo’s sample modules as an example but you could use any other web application as well. If you are otherwise starting pretty much from scratch, follow these steps to set everything up:
- Download Tomcat 8 and install to a location of choice
- Download Eclipse Tomcat Plugin from Eclipse marketplace (Help/Eclipse Marketplace…).
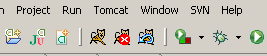
- Restart Eclipse, verify you see the Tomcat control buttons in Eclipse toolbar
- git clone git@github.com:tynamo/tynamo-examples.git (or any other Maven project of choice)
- Import… / Existing Maven Projects, navigate to tynamo-examples.git/recipe folder (or whatever Maven project folder you want to run in Tomcat)
- Configure Tomcat Launcher:
- In Window / Preferences / Tomcat, set Tomcat version to 6.x (even for 7.x) and set the home folder. Set Context declaration mode to context files
- In Tomcat / JVM Settings, add Jar/Zip item and point to tomcat-juli.jar found in your TOMCAT_HOME/bin folder (this is only needed for 7.x)
- In Tomcat / JVM parameters, add parameters as appropriate. I typically use at least: -Dtapestry.production-mode=false and -XX:MaxPermSize=256m
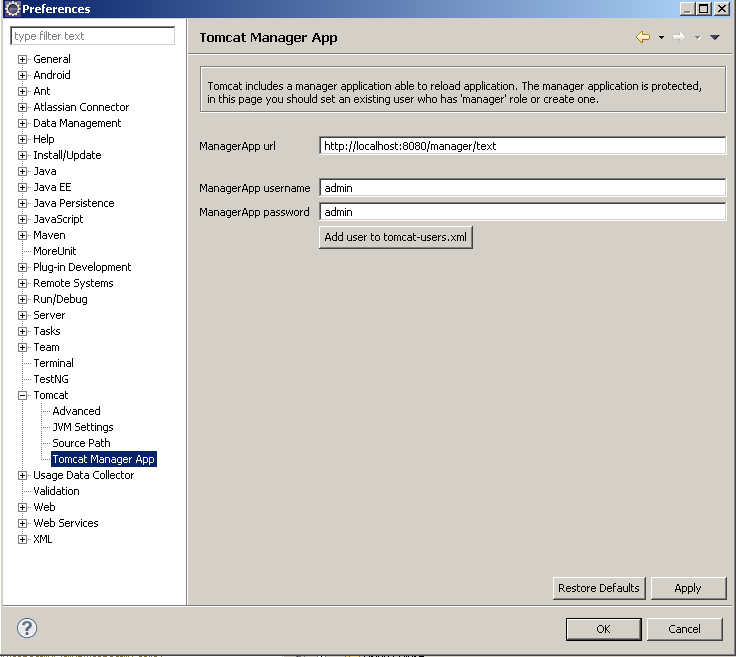
- In Tomcat / Tomcat Manager App, set manager app url and manager admin username and password correctly. Set manager app url to …/manager/text (for Tomcat 7.x - the default /manager/ is correct for previous versions).
- Install devloader for Tomcat (for Tomcat 7.x use devloader from version 3.3). The devloader.zip is found inside Sysdeo’s Tomcat Launcher zip package. Unzip and copy the org folder and its contents to TOMCAT_HOME/lib
- In project properties (choose project, ALT+ENTER) configure Java build path
- For src/main/resources folder, set the output to the same as the source folder (i.e. src/main/resources, Eclipse doesn’t have a separate checkbox for “don’t copy”)
- For default output folder, keep the output folder as /target/classes if you are using m2eclipse (this is because of limitations in m2eclipse’s implementation). Otherwise, you may want to set the output to something else, such as /target/eclipse-classes so it differs from Maven default (/target/classes) so you can use both Eclipse and Maven from command line without them stepping on each other
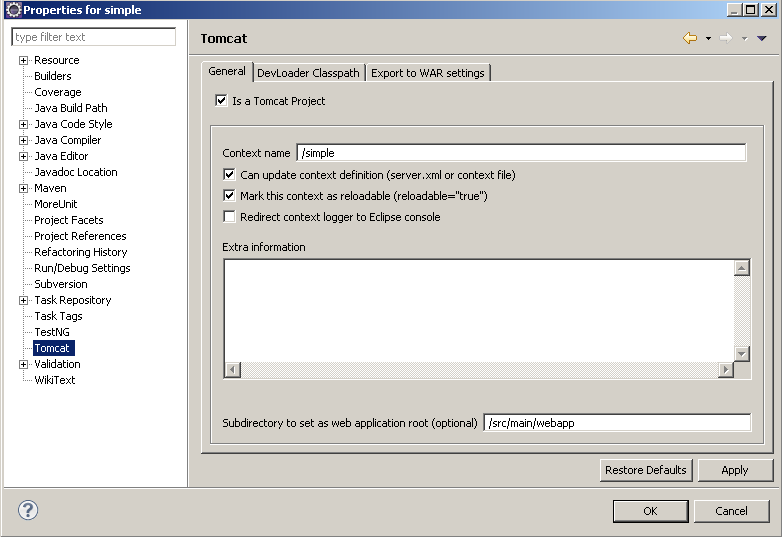
- In project properties / Tomcat
- Check “Is a Tomcat Project”
- Context name as you like, I often use just /ROOT for simplicity
- “Subdirectory to set as web application root”, set “src/main/webapp”
- On “DevLoader ClassPath” tab, check activate DevLoader. Configure as appropriate, but typically “Check All” libraries, find servlet-api and uncheck it (obviously the container contains those classes and wants to load from there rather than as part of the web application). Also uncheck all of jre libs and “MAVEN2_CLASSPATH_CONTAINER” at the bottom, and for the simple webapp, you also need to uncheck the jetty-libs, particularly the servlet api included by Jetty.
- Enjoy live class reloading and your optimized development cycle :)
Alternative configurations
If you know your way around Eclipse and Tomcat, there’s no need to follow the steps literally but most of it applies regardless of Eclipse or Tomcat versions or even if you were using something else than Tapestry 5. I’ve been developing webapps this way for years, since the days of Eclipse 3.0 and Tomcat 5.0 (with MyFaces…) circa 2004. Tomcat 5.x and 6.x would work the same with no or little modifications, but a major benefit of Tomcat 7.x is that context reloading actually works - before 7.x it never really worked for even a bit more complex web applications. With context reloading, you can for example edit the web.xml and expect your application to be reloaded automatically. You can also run multiple web applications at the same time while you are still developing them. That also allows easily testing the more interesting aspects of web application deployments, such as session serialization, clustering and high availability, all from your development machine!
With run-jetty-run (which I do use frequently), it’s simpler and more automated to get started but it’s not possible to directly modify the container’s classpath, you cannot reload the context only and it’s not meant for running several web applications at the same (which may or may not be important for your use case). Choose the tool that better fits your development style, but in any case, it’s always useful to know your tools. Also, supporting multiple runtime and development configurations hardens your application in the long run. Typically, you should make sure that other people could simply run mvn jetty:run (or similar) from the command line to run your web application even if you don’t use it for development. An automated and well-maintained development environment always pays dividends later regardless of whether it is an open source or a commercial web application that you are developing. Most of the designers I work with are happily running running mvn jetty:run and editing the Tapestry html templates live on their own systems without any knowledge of Java or Maven or the machinery that makes this possible in the background.
Troubleshooting
One potentially frustrating aspect with Sysdeo’s launcher is the need to manually maintain the webapp classpath. When you are starting a new project, you frequently hit duplicate class errors which you need to fix first. However, in return you get full control of the classpath and very quick way of switching between different versions of a particular library. Personally I switch between development and release libraries quite often and nothing beats the convenience of developing and debugging a new version of a library in place together with your actual web application.
As mentioned earlier, a duplicate servlet-api in your webapplication classpath will mess up your container for sure. For Tapestry, if you see an exception trace similar to:
Nov 15, 2010 10:38:47 AM org.apache.catalina.core.StandardContext filterStart
SEVERE: Exception starting filter app
java.lang.ClassCastException: org.apache.tapestry5.TapestryFilter cannot be cast to javax.servlet.Filter
	at org.apache.catalina.core.ApplicationFilterConfig.getFilter(ApplicationFilterConfig.java:248)
you can be pretty sure that you have a duplicate servlet-api in your classpath.
Most other issues running your webapp can traced down to classpath issues, such as library incompatibilities and classloader problems. Fix the common cases first and if you still don’t know what the problem is, reduce the problem scope to a minimum number of dependencies and then enable libraries one by one. Nowadays typical Java webapps tend to use use tens of different libraries so this may often take some time but at least you’ll learn something along the way and hopefully might even be able to eliminate a few dependencies that you didn’t even know were included.
Using Gradle?
If you are using Gradle, then you are in luck. Dmitry Gusev (also author of eclipse-tapestry5-plugin ) has put together a little Gradle plugin that automatically maintains the “.tomcatplugin” file that contains the classpath configuration for Sysdeo. Check out gradle-sysdeo-tomcat-plugin!